Create Widget App
Steps to create a chat app on the Widget channel from the admin panel.
The application ID (appId) returned after creation is passed to the npm packages on the embed side.
Prerequisites
| Requirement | Description |
|---|---|
| Permission | Access to the Apps menu |
| Company | A company registered in the system |
| Assistant | An assistant may be required depending on the AI type (Agent AI / Document-Based) |
1. Go to the Apps page
Settings → Apps
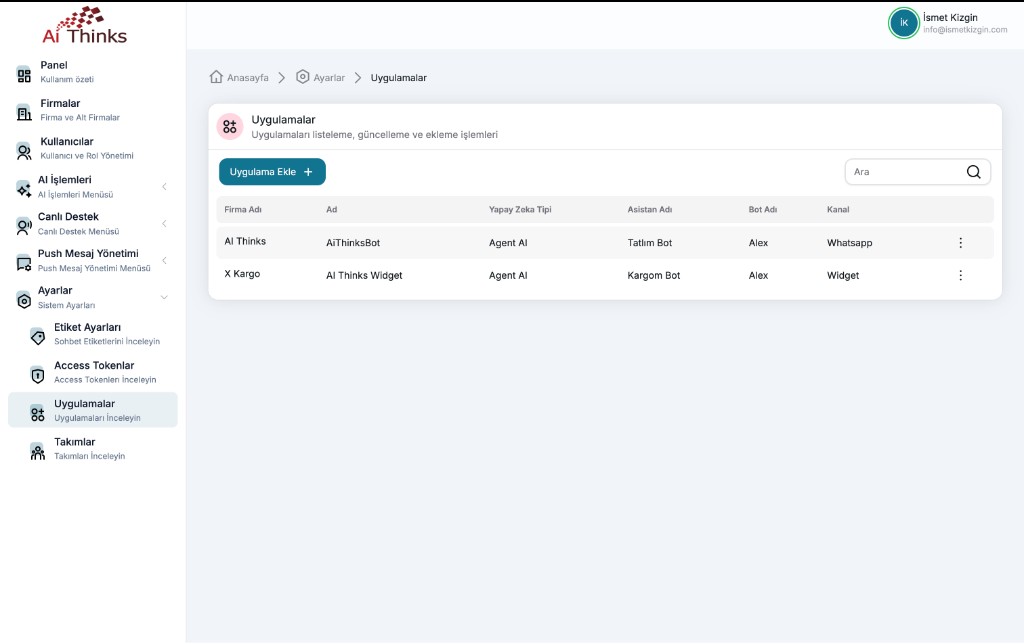
On this screen you see existing apps. The Channel column shows values such as Widget or Whatsapp. Use the Add App + button to create a new record.
2. Fill in the basic fields
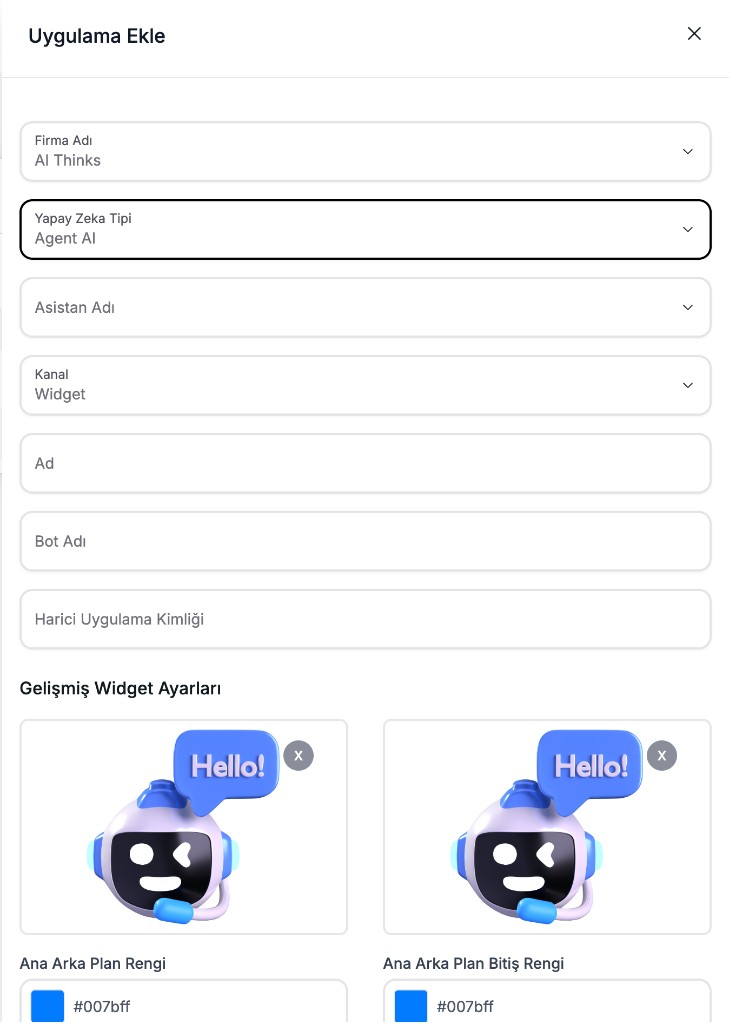
| Field | Required | Description |
|---|---|---|
| Company Name | Yes | The company the app is linked to |
| AI Type | Yes | Flow-Based / Document-Based / Agent AI |
| Assistant Name | Conditional | Listed or required depending on the selected AI type |
| Channel | Yes | Select Widget |
| Name | Yes | The app name in the panel |
| Bot Name | Yes | The bot name shown to the visitor in chat |
| External Application ID | Yes | External system reference (free text; not a UUID) |
When the channel is set to Widget, the Advanced Widget Settings section appears.
3. Advanced Widget Settings
Icons
- Widget icon (
widgetIconUrl) — the launcher / widget icon shown on the page - AI icon (
aiIconUrl) — the bot avatar inside the chat - Maximum file size: 2 MB
Primary colors
At the top of the form you set the primary background and gradient stop colors:
| Field | Config key | Description |
|---|---|---|
| Primary Background Color | primaryBackgroundColor | Widget primary color |
| Primary Background Stop Color | primaryBackgroundColorStop | Gradient stop color |
For detailed color and form fields, see Widget Settings.
4. Save
Create the app with Save. On success, the app appears in the list.
After creation
From the row menu in the list:
| Action | Description |
|---|---|
| Copy Application ID | Copies appId (UUID) to the clipboard |
| Widget Test | Opens the test site with appId |
| Edit | Update using the same form |
| Delete | Apps that have chats cannot be deleted |